Transforming your outdoor space can be a rewarding DIY project, especially when it involves giving your deck a fresh coat of paint or stain. Not only does this enhance the aesthetic appeal of your home, but it also provides a protective layer against the elements.
This comprehensive guide will walk you through each step of the process, from selecting the right materials to applying the finishing touches, ensuring your deck looks stunning and stands the test of time.
Choosing the Right Paint or Stain
The first step in your deck transformation journey is selecting the right paint or stain. This choice is crucial as it affects the appearance, durability, and maintenance of your deck. Paints offer a wide range of colors and provide a solid, protective layer over the wood. Stains, on the other hand, penetrate the wood, offering a more natural look while highlighting the grain.
Consider the current condition of your deck, your desired aesthetic, and the climate you live in. High-quality, weather-resistant options are best for longevity, ensuring your deck withstands the elements year-round.
Preparing Your Deck for Painting
Preparation is key to ensuring your paint or stain adheres properly and lasts longer. Start by removing all furniture and debris from the deck. Inspect the surface for any loose nails or screws and secure them.
If your deck has been previously painted or stained, you may need to strip the old finish to ensure the new coating adheres well. This step is labor-intensive but crucial for a smooth, even application of the new paint or stain.
Essential Tools and Materials
Before diving into your project, gather all necessary tools and materials. You’ll need a high-quality paintbrush, roller, or sprayer for application, depending on the size of your deck and the type of paint or stain you’re using.
Sandpaper, a power washer (or a stiff-bristled brush and cleaning solution), painter’s tape, and drop cloths are also essential. Choosing the right tools not only makes the job easier but also affects the finish quality. If you’re lacking tools or materials you’re better off visiting https://decksforlife.ca/.
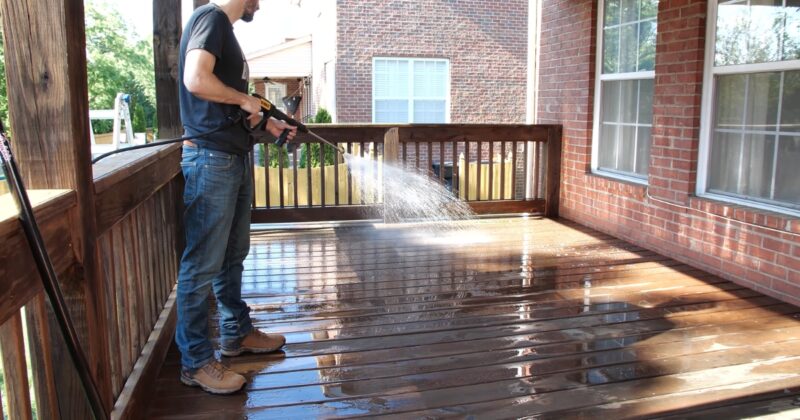
Cleaning and Repairing Damaged Areas
A clean surface is essential for paint or stain to adhere correctly. Use a power washer or a cleaning solution and a stiff-bristled brush to remove dirt, mildew, and old paint flakes. After cleaning, inspect the deck for damaged areas. Replace rotten wood and repair any cracks or splinters. This step is vital for a smooth finish and the longevity of your deck.
Sanding for a Smooth Surface
Sanding your deck is crucial for removing any remaining old paint, stains, or rough spots, ensuring a smooth surface for painting. Use a power sander or hand sand with medium to fine-grit sandpaper, depending on the condition of your deck.
Sanding not only improves adhesion but also enhances the final appearance of your deck. It’s important to sand along the grain of the wood to avoid creating scratches that could be visible after painting or staining. Additionally, removing all dust after sanding is essential for the best paint or stain application.
Priming for Long-Lasting Results
Priming is an often overlooked but essential step, especially if you’re painting your deck. A good primer provides a smooth base for the paint, improving its adhesion and durability. Choose a primer designed for exterior use and compatible with your paint.
Although staining typically doesn’t require a primer, some situations may benefit from a pre-stain conditioner. Applying primer on a clean, dry surface ensures that your deck will have an even color and finish, preventing the wood from absorbing too much paint and saving you time and resources in the long run.
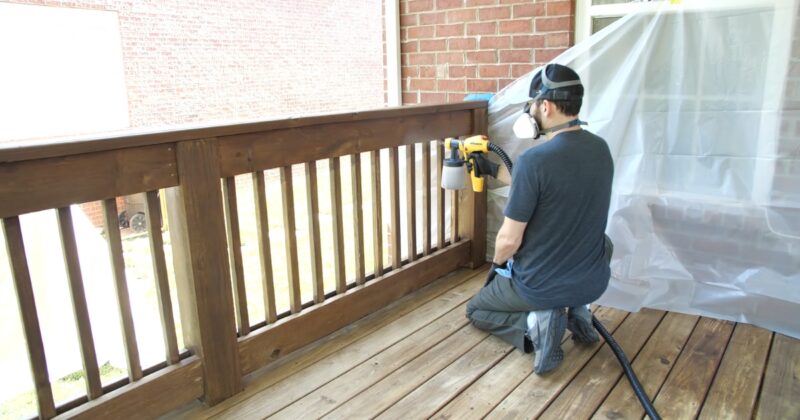
Applying the Paint or Stain
Now, the transformative part—applying the paint or stain. Start from one end of the deck and work your way to the other, using long, even strokes. If you’re using paint, apply it in thin, even layers, allowing each layer to dry thoroughly before applying the next. For stains, apply with a brush or sprayer and wipe away excess with a rag to ensure even penetration.
This meticulous approach helps avoid the pitfalls of uneven coverage and ensures that the color looks consistent across the entire deck. Remember, the quality of your application significantly impacts the longevity and appearance of your finish.
Techniques for Even Coverage
Achieving even coverage requires patience and attention to detail. Use a brush to cut in around edges and in tight spaces where rollers and sprayers can’t reach. When using a roller or sprayer, maintain a consistent speed and pressure to avoid drips and uneven layers. Overlapping your strokes slightly will help ensure complete coverage without missed spots.
Dealing with Tricky Areas: Corners, Edges, and Railings
Corners, edges, and railings can be challenging due to their intricate shapes and angles. Use a smaller brush for these areas, applying paint or stain with care to avoid drips and uneven coverage. Patience is key—take your time to ensure these tricky spots receive the same attention as the larger, easier-to-reach areas.
Drying and Curing Time
After applying the final coat, allow ample time for the paint or stain to dry and cure fully. This process can take several days, depending on the product used and the weather conditions. Avoid placing furniture on the deck or walking on it excessively during this time to ensure the best possible finish.
Adding a Protective Sealant
For added durability and protection, consider applying a clear sealant over the paint or stain. This step is especially recommended for stained decks, as it provides an extra layer of protection against moisture, UV rays, and wear. Choose a sealant compatible with your paint or stain and apply it according to the manufacturer’s instructions.
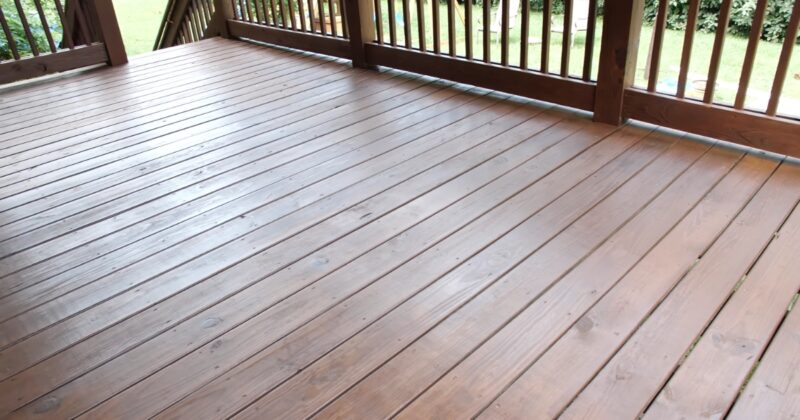
Maintenance Tips for a Beautiful Deck All Year Round
Regular maintenance is essential to keep your deck looking its best. Clean it seasonally to remove dirt and debris, and inspect it annually for any signs of wear or damage. Touch up paint or stain as needed, and reapply sealant every few years to ensure ongoing protection.
With proper care, your deck can remain a beautiful and durable part of your outdoor space for many years to come.
Transforming your deck is a rewarding project that not only enhances the beauty of your outdoor space but also protects and extends the life of your investment. By following these steps and investing time and care into the process, you can achieve professional-quality results and enjoy a stunning deck that welcomes you into the great outdoors.