For PC enthusiasts and gamers, the aesthetics of the computer build are just as important as its performance. One such way to enhance the appearance of your PC is by vertically mounting your GPU (Graphics Processing Unit).
Not only does this showcase the design of your graphics card, but it can also be a conversation starter for anyone admiring your setup. In this comprehensive guide, we’ll delve deep into how you can vertically mount your GPU, ensuring both safety and style.
Why Vertical Mounting?
Before diving into the steps, it’s crucial to understand the reasons behind vertical GPU mounting. This section will outline the aesthetic and functional benefits it brings.
Aesthetics of Vertical GPU Mounting

Nothing shows off your graphics card better than having it displayed vertically. Imagine your graphics card, with its intricate design, RGB lighting, and branding, being the centerpiece of your build.
- Showcase Design: Graphics cards nowadays come with intricate designs and impressive shrouds that deserve to be showcased.
- RGB Display: For graphics cards with RGB lighting, vertical mounting allows the colors and patterns to be more visible and prominent.
Functionality and Airflow
Beyond looks, vertical mounting can, in some cases, offer improved airflow and cooling. However, there’s a caveat.
- Increased Airflow: In open case setups or those with ample space between the GPU and the side panel, vertically mounting can prevent the graphics card from being closely sandwiched between other components, potentially improving airflow.
- Potential Downsides: If mounted too close to a case’s side panel, a vertically mounted graphics card could have restricted airflow, leading to increased temperatures. Always ensure ample space for air circulation.
The Tools and Kits You Need
Now that we know the ‘why’ let’s get into the ‘how.’ To get started with vertical GPU mounting, you need to arm yourself with the right tools and kits.
The Vertical Graphics Card Mounting Bracket

This is the primary tool you’ll need to hold your GPU in place vertically.
- Compatibility: Ensure the bracket is compatible with your case and graphics card.
- Sturdiness: It should be made of durable material to securely hold the GPU without wobbling.
Risers and Extension Cables
These are essential to connect your vertically mounted GPU to your motherboard.
- Quality: Opt for shielded cables to prevent any interference.
- Length: Make sure the cables are long enough to connect your GPU to your motherboard comfortably, without excessive stretching or bending.
The Vertical GPU Mounting Process
With the tools in hand, you’re all set to vertically mount your graphics card. Follow this step-by-step guide to ensure a smooth process.
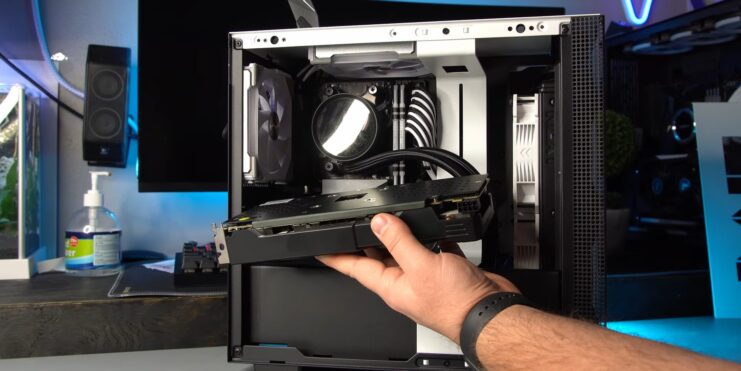
Preparing Your PC Case
- Unplug and Clean: Before making any changes, turn off your PC, unplug it from the power source, and give it a thorough cleaning.
- Removing Current GPU: If your graphics card is already installed in the traditional manner, you’ll need to remove it. Carefully unlatch it from the PCIe slot and unscrew any securing screws.
Installing the Vertical Mounting Bracket
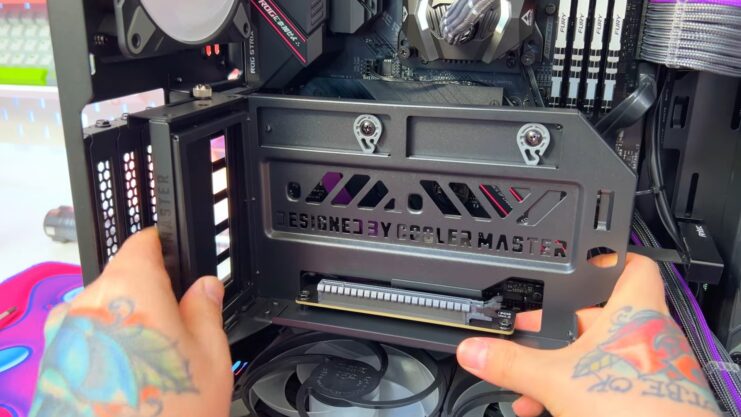
- Follow the Instructions: Each mounting bracket will come with its set of instructions. Generally, you’ll screw the bracket into the existing PCIe slot covers’ locations.
- Secure Your GPU: With the bracket in place, you can now mount your graphics card vertically onto the bracket. Ensure it is securely attached to prevent any potential damage.
Connecting Your Graphics Card
Having securely mounted the GPU, the final step is to establish the connection between the it and the motherboard.
Using the Riser and Extension Cables
- Connect to the GPU: Start by attaching one end of the riser or extension cable to your graphics card.
- Attach to Motherboard: Route the cable to your motherboard and plug it into the appropriate PCIe slot. Ensure the connection is snug and secure.
Testing and Troubleshooting
- Power Up: With everything connected, power up your PC. Your graphics card should light up and be recognized by your system.
- Potential Issues: If your graphics card isn’t recognized, re-check your connections. Ensure that the extension cable is securely connected at both ends.
Fine-tuning and Aftercare
Once your GPU is vertically mounted, there’s a bit more to do to ensure long-term success and optimal performance. It’s not just about setting and forgetting; consistent monitoring and care will keep your setup in peak condition.
Monitoring GPU Temperatures
A significant concern with vertically mounting GPUs is the potential for increased temperatures. Here’s how to keep an eye on it:
- Use Monitoring Software: Tools like HWMonitor, MSI Afterburner, or GPU-Z provide real-time temperature readings and other essential statistics.
- Check Regularly: Especially in the first few days after mounting, check temperatures during idle and load conditions. This will help you understand if your GPU is receiving adequate cooling.
Optimal Case Fan Configuration
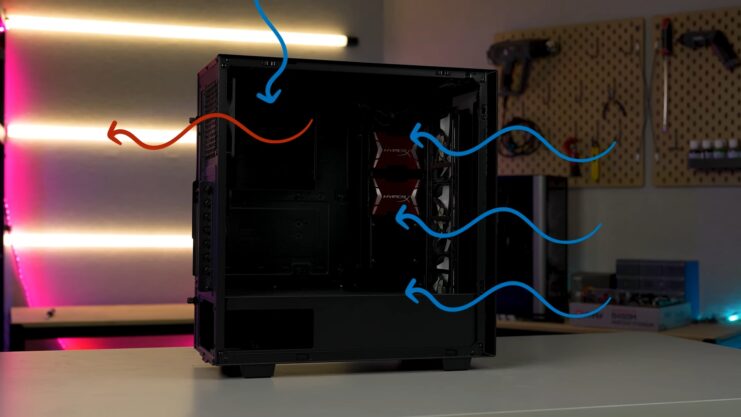
For the best cooling performance, optimizing case fan configurations is crucial.
- Intake and Exhaust: Ensure there’s a balance between intake and exhaust fans. A positive pressure setup (more intake than exhaust) can help in pushing hot air out of the case.
- Positioning: Place intake fans near the graphics card to feed it fresh air and position exhaust fans at the top or back to vent out the hot air.
Potential Upgrades and Enhancements
For those who wish to take their vertical GPU mounting to the next level, consider some upgrades and enhancements to further improve both aesthetics and functionality.
RGB Lighting
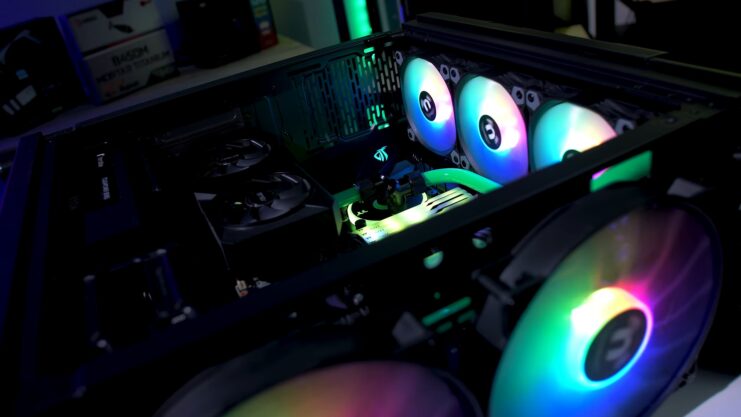
Enhance the visual appeal of your vertically mounted GPU with additional RGB lighting.
- RGB Strips: These are easy to install and can complement the lighting on your graphics card.
- Sync with GPU Lighting: Many RGB controllers or software allow for syncing light effects across different components, ensuring a cohesive look.
Custom Cooling Solutions
If you’re concerned about temperatures, custom cooling solutions might be the answer.
- Aftermarket Air Coolers: These can offer improved cooling performance compared to stock GPU coolers.
- Liquid Cooling: For the ultimate in cooling (and aesthetics), consider a custom loop or an AIO (All-In-One) GPU cooler. This can significantly lower temperatures but requires a more intricate setup and maintenance.
FAQs
Is every computer case compatible with vertical GPU mounting?
No, most cases, especially older ones, are not designed for this purpose. It’s essential to check your case’s specifications before attempting vertical mounting.
What’s the difference between horizontal and vertical GPU mounting in terms of cooling?
When mounted horizontally, the graphics card’s fan faces downwards, which can cause hot air to accumulate around the graphics card, leading to higher temperatures. In contrast, vertical mounting can improve airflow and cooling as the graphics card’s fan faces the side of the case.
Does vertical mounting affect the GPU’s performance?
No, vertical mounting does not inherently affect the graphics card’s performance. In fact, with proper airflow, it can improve the system’s cooling performance.
Are there any potential problems with mounting a GPU vertically?
Yes, if there’s very little distance between the graphics card fans and the side of the PC case, especially with solid side panels, it can restrict airflow, causing the card to run hotter and decrease performance.
Does a vertically mounted GPU take up more space?
It can cover up all your remaining PCIe slots, which means you won’t be able to attach additional cards like network cards. However, using a PCIe riser cable can help avoid this issue.
Can any GPU be mounted vertically?
Not all graphics cards are designed for vertical mounting. Some come with a backplate that supports only horizontal mounting. It’s essential to check your graphics card’s specifications and possibly remove the backplate if necessary.
Does vertical mounting prevent GPU sagging?
Vertical mounting can significantly reduce graphics card sag, especially if the mounting bracket is sturdy. However, if the bracket is not touching the PC case and is lifted, it can stretch the attached PCIe riser cable, potentially causing sagging.
Can I vertically mount a liquid-cooled GPU?
Yes, a liquid-cooled graphics card can be mounted vertically in the same manner as a regular one.
Final Words
By now, you should have a beautifully vertically mounted GPU, elevating the aesthetics of your PC build. Remember, while the appearance is essential, always ensure that your graphics card receives adequate cooling. Regularly monitor temperatures, especially after making any modifications to your setup. Here’s to a blend of style and performance!